持续集成,听起来很棒的样子,我就小做尝试一把
1.GitLab-Runner 下载
https://docs.gitlab.com/runner/
sudo curl --output /usr/local/bin/gitlab-ci-multi-runner https://gitlab-ci-multi-runner-downloads.s3.amazonaws.com/latest/binaries/gitlab-ci-multi-runner-darwin-amd64

sudo chmod +x /usr/local/bin/gitlab-ci-multi-runner
2.查看 GitLab 中项目的 Runners
项目页面 -> ⚙️ 设置(齿轮图标) -> Runners
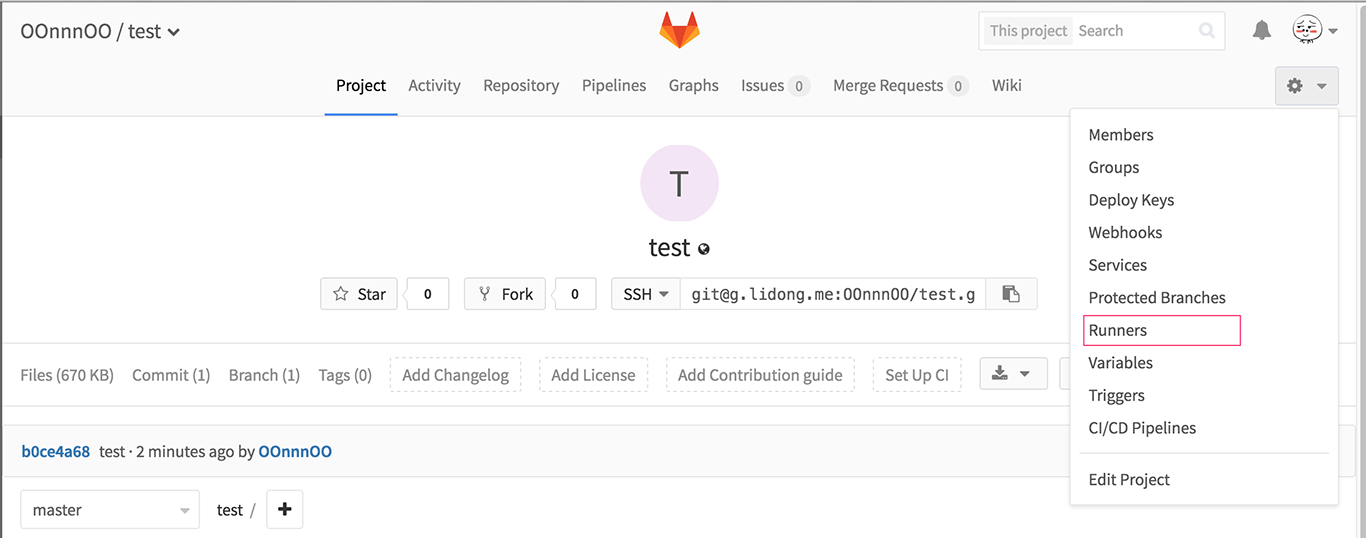
查看 Runners
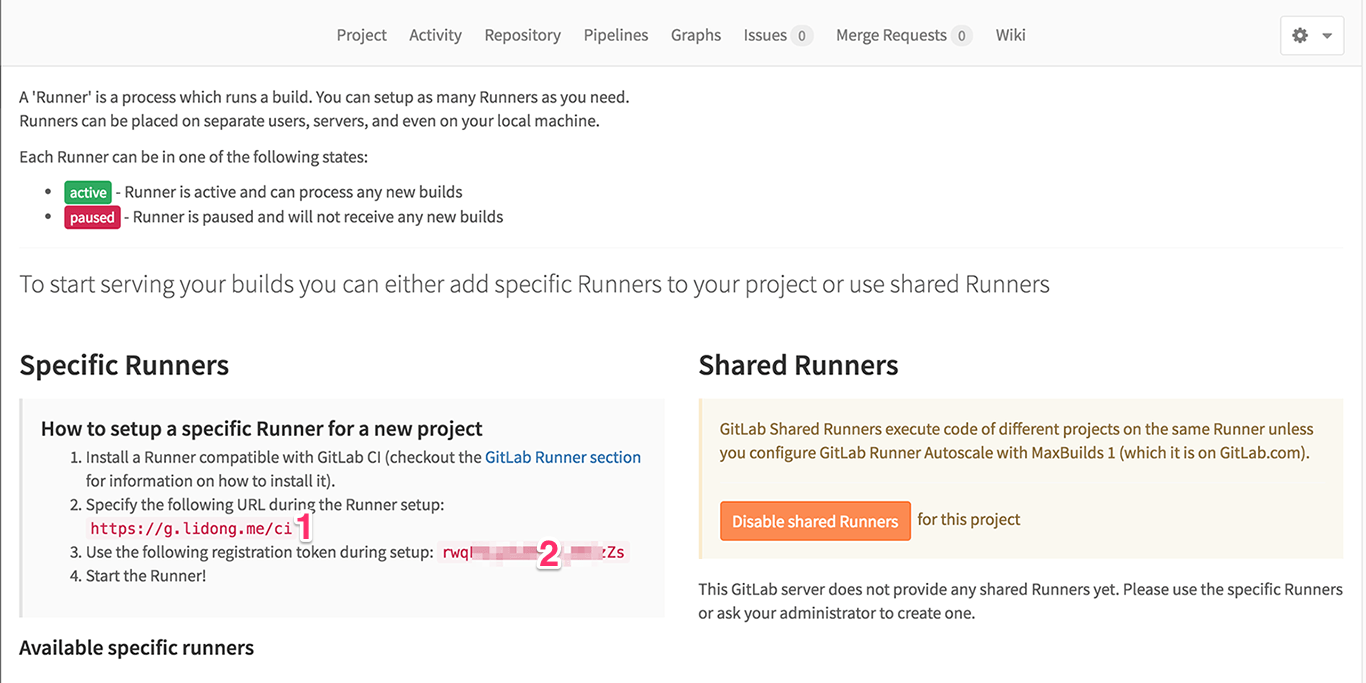
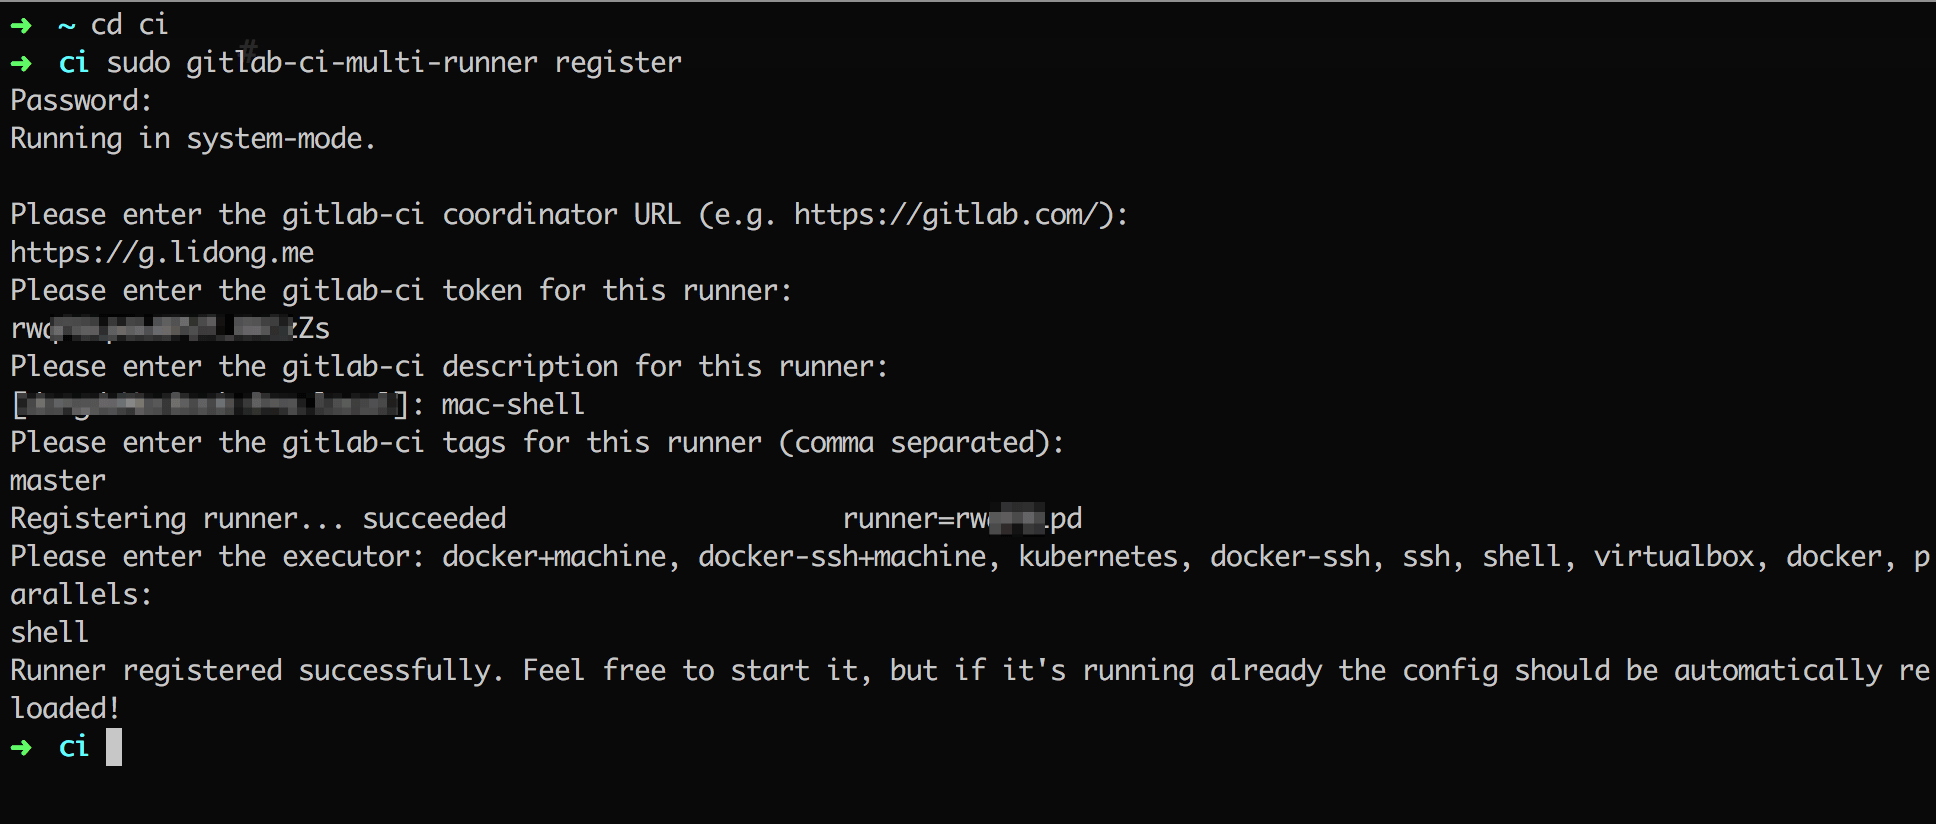
3.注册 Runners
gitlab-ci-multi-runner register
根据提示,填写
- GitLab->Runners 的 Url 地址 ①
- GitLab->Runners 的 registration token②
- runner 名称,这个随便写
- 分支名,master
- 协议方式,shell ⚠️ 注:使用 sudo,可以防止稍后 runners 中,执行可能因为权限问题而执行失败,
4.开启 gitlab-runner 服务
gitlab-ci-multi-runner install
gitlab-ci-multi-runner start
5.设置 .gitlab-ci.yml 脚本
编辑 .gitlab-ci.yml,文件名为固定格式,并将文件放在 git 库的跟目录下。
下面是 gitlab-ci 中的一个部署 hexo 模版,正好可以拿来使用
更多配置文件编写方法 👉官方文档
# This file is a template, and might need editing before it works on your project.
# Full project: https://gitlab.com/pages/hexo
image: node:4.2.2

pages:
  cache:
    paths:
      - node_modules/

  script:
    - npm install hexo-cli -g
    - npm install
    - hexo deploy
  artifacts:
    paths:
      - public
  only:
    - master
6.完成配置
设置完成 .gitlab-ci.yml ,每当有新的提交 Gitlab CI 就会运行

更新记录
2016 年 12 月 1 日 首次发布